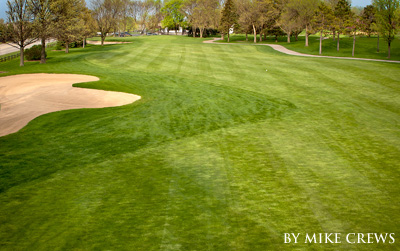
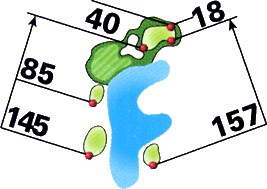
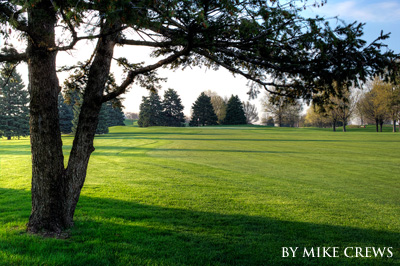
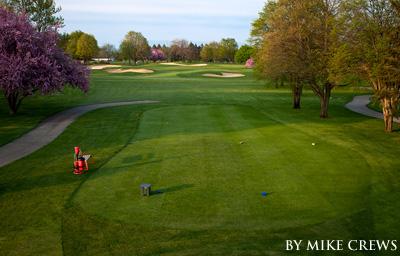
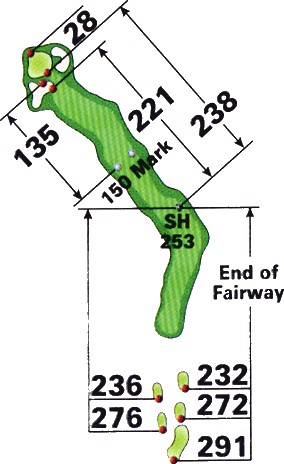
Hole 1
Par 5
A precise drive is required to make this green reachable in 2 shots. A definite birdie hole to start your round. Putt will fall for you on this relatively flat green.

Hole 2
Par 4
Thread the needle between the fairway bunker on the left and water on the right. 3-wood or hybrid is the play off this tee. Softest green on the course will hold any shot, so be aggressive.
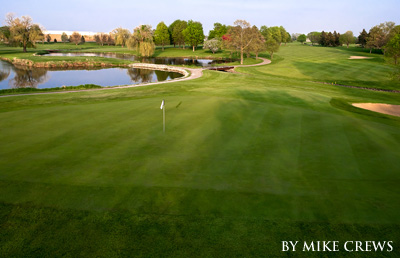
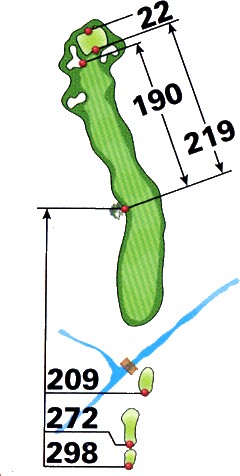
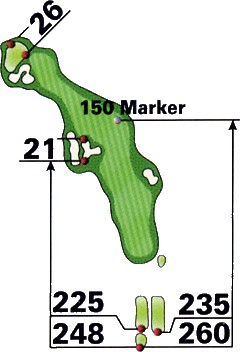
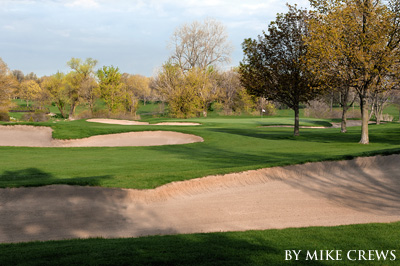
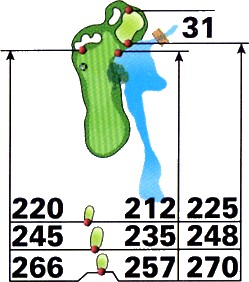
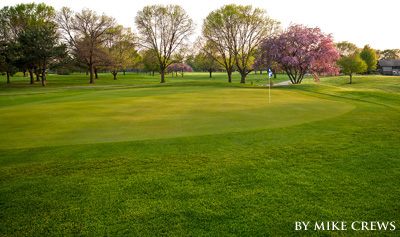
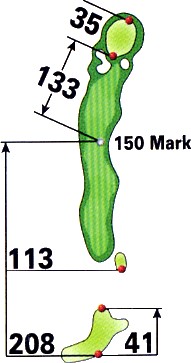
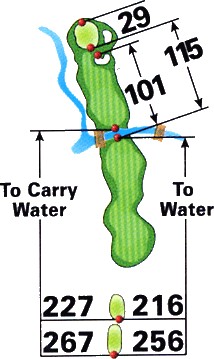
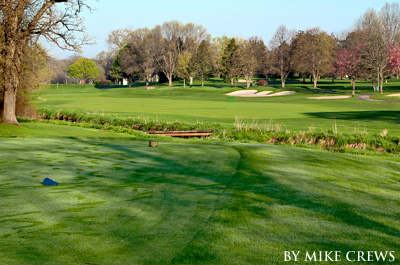
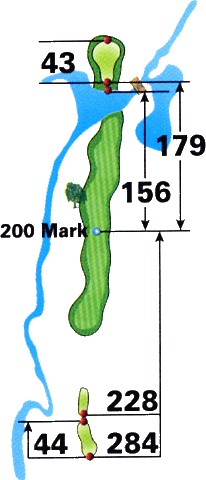
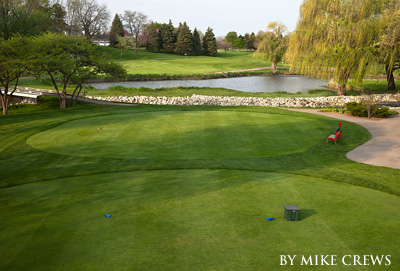
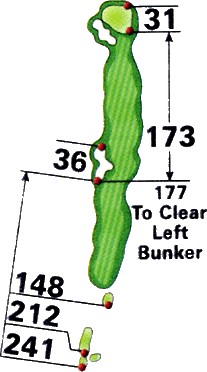
Hole 3
Par 3
Beautiful evergreens are the backdrop to this deceptively difficult Par 3. Extremely sloped from back to front, stay below the hole at all costs.
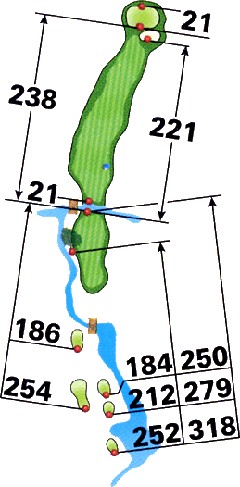
Hole 4
Par 4
The most demanding hole off the tee on the course. Risk/reward awaits your decision. Approach plays slightly uphill.
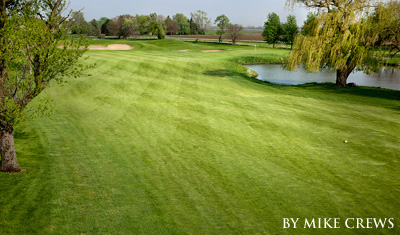
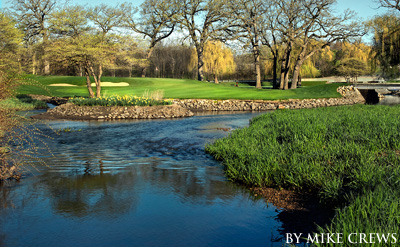
Hole 5
Par 4
Stay right of the bunkers on this dogleg left. Your approach shot will stop quickly on this back to front sloped green.

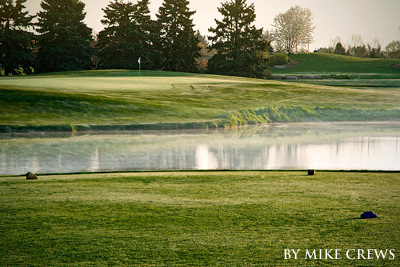
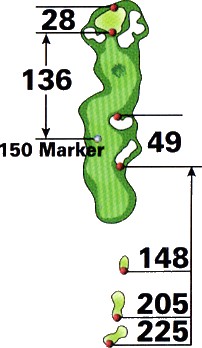
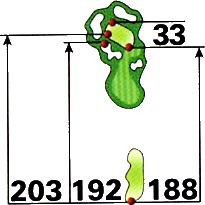
Hole 6
Par 3
Carry the bunkers on this difficult Par 3, long is jail however. Be patient putting on this hole, par is a great score.

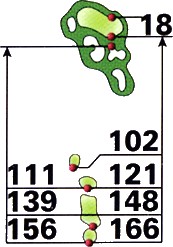
Hole 7
Par 4
Tee it high and let it fly on this short Par 4. A short iron approach will leave you with an easy birdie chance.
Hole 8
Par 4
Drive the green or lay up? This hole is no gimme, no matter what the scorecard says. Patience is required once again on this undulating green.
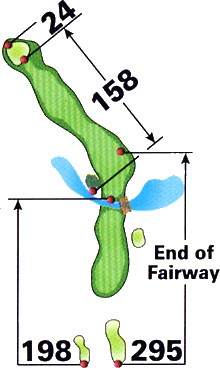
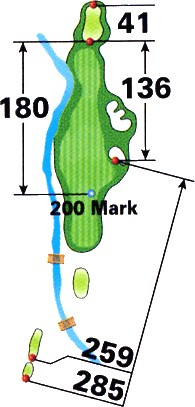
Hole 9
Par 5
Hit your drive down the hill as far as possible to set up your second shot over the creek. Drop a wedge on the pin and make your four and get ready for the back 9.
Hole 10
Par 4
Swing away and enjoy your start to the back 9 on this short Par 4. Keep your ball below the hole and you will be just fine.
Hole 11
Par 3
A challenging Par 3 awaits and rewards good shot placement. This wide green welcomes Par as a good score.
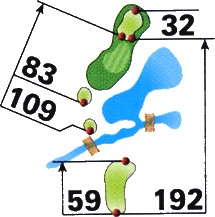
Hole 12
Par 4
Check the wind before you decide to lay up or drive it over the creek. This challenging green will test your putting skills to the max.
Hole 13
Par 4
Draw it around the corner with a driver or 3-wood to set up a short iron into the green. A large green welcomes good shot placement and a birdie opportunity.
Hole 14
Par 5
Stay on the right side of the fairway on our Signature Par 5. Risk/reward once again is in play on your second shot to a challenging green.
Hole 15
Par 3
This longer Par 3 demands proper club selection. Simple, back to front sloped green rewards good putting.
Hole 16
Par 5
Cut the corner on this dogleg left to set up a chance to go for the green in two. Make your birdie and finish strong.

Hole 17
Par 4
A long, demanding Par 4 usually into a prevailing wind. Two putts on this green make par a good score here.
Hole 18
Par 4
A great finishing hole requires your attention until the very end. Another sloped back to front green awaits our putting prowess. Head into the restaurant for a cold one after your round!